
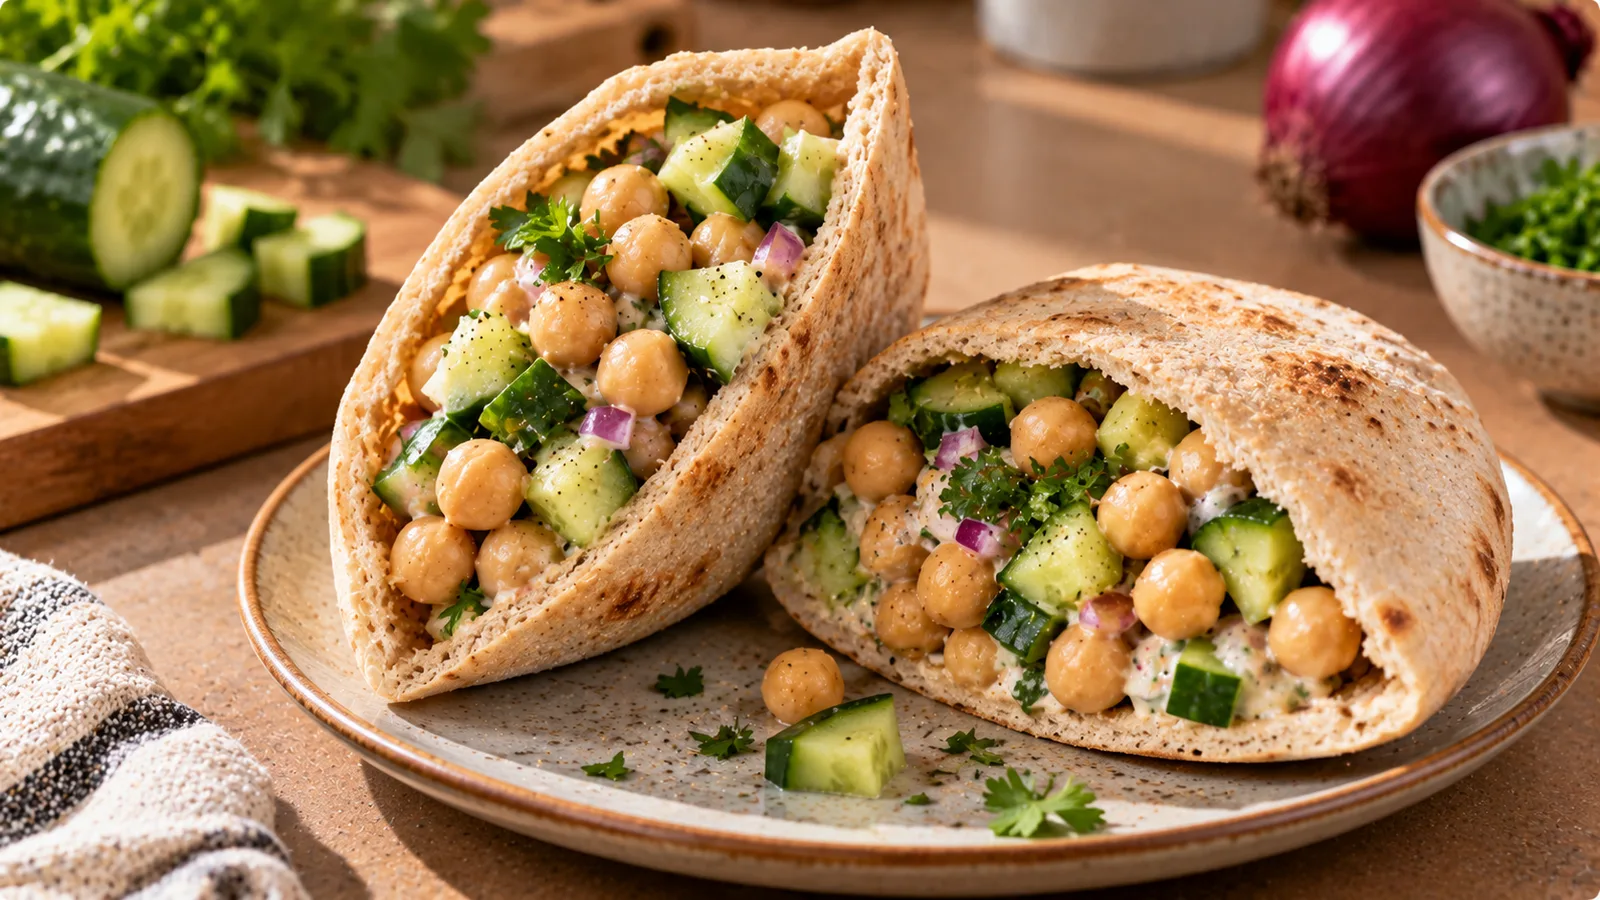
Chickpea and cucumber pita pockets are a practical lunch when you want something fresh, filling and easy to assemble without cooking a complete meal.
Tender chickpeas provide substance, cucumber adds crunch, and a lemon-herb yogurt sauce brings the ingredients together. Everything is tucked into warm whole-wheat pita bread.
The key to a good pita pocket is moisture control. Drain the chickpeas thoroughly, remove excess liquid from the cucumber and keep the dressing thick enough that it coats the filling without soaking the bread.
This version makes four generous pita pockets using ordinary supermarket ingredients.
Recipe overview
| Detail | Amount |
|---|---|
| Servings | 4 |
| Yield | 4 filled pita breads |
| Preparation time | 15 minutes |
| Cooking time | 3–5 minutes to warm the pita |
| Total time | Approximately 20 minutes |
| Main ingredients | Chickpeas, cucumber, pita, yogurt |
| Dietary style | Vegetarian |
| Approximate energy | 390 kcal per serving |
| Approximate protein | 17 g per serving |
The nutrition figures are estimates based on the ingredient quantities below. Actual values depend on the bread, yogurt and chickpea products used.
Ingredients for four servings
Chickpea and cucumber filling
| Ingredient | Quantity |
|---|---|
| Canned chickpeas, drained and rinsed | 480 g |
| Cucumber | 300 g |
| Cherry tomatoes | 160 g |
| Red onion | 60 g |
| Fresh parsley | 15 g |
| Lemon juice | 20 g |
| Olive oil | 10 g |
| Ground cumin | 1 teaspoon |
| Black pepper | To taste |
| Salt | To taste |
Yogurt dressing and bread
| Ingredient | Quantity |
|---|---|
| Plain Greek-style yogurt, approximately 2% fat | 160 g |
| Lemon juice | 15 g |
| Fresh garlic | 5 g |
| Fresh dill | 10 g |
| Whole-wheat pita breads | 4 × 65 g |
| Water | 5–15 ml, only if needed |
Use the drained weight of the chickpeas, not the total weight printed on a can that includes packing liquid.
If a can provides 240 g of drained chickpeas, two such cans supply the 480 g required.
Choose pita breads that can open into pockets. Some flatbreads are sold as pita but do not form a usable pocket.
Step 1: Prepare the chickpeas
Drain the canned chickpeas in a colander and rinse them under running water.
Allow excess water to drain.
Transfer the chickpeas to a large mixing bowl.
Lightly crush approximately one-quarter of the chickpeas with a fork, leaving the rest whole.
This creates a mixture of textures. The partially mashed chickpeas help the filling hold together without turning it into hummus.
Add the olive oil, 20 g lemon juice, cumin, black pepper and a modest amount of salt.
Stir gently.
Taste before adding more salt, especially if the canned chickpeas were already salted.
Step 2: Prepare the vegetables
Cut the cucumber into small cubes, approximately 5–8 mm across.
If the cucumber has a very watery center, scoop out some of the seeds before chopping.
Pat the pieces dry with a clean kitchen towel or paper towel.
Quarter the cherry tomatoes and let any excessive juice drain away.
Finely chop the red onion and parsley.
Add the vegetables and parsley to the chickpea mixture.
Mix just enough to distribute everything evenly.
Avoid aggressively crushing the cucumber and tomatoes, which would release more moisture.
Step 3: Make the lemon-herb yogurt sauce
Combine the yogurt, 15 g lemon juice, finely grated garlic and chopped dill in a small bowl.
Stir until smooth.
If the sauce is too thick to spread, add a little water, starting with 5 ml.
The dressing should remain thick enough to cling to the filling.
A thin, pourable sauce is more likely to make the pita soggy.
Taste and adjust the seasoning.
The garlic flavor becomes stronger as the sauce rests, so start with the specified amount rather than adding several cloves immediately.
Step 4: Warm the pita breads
Warm the pita breads according to their package instructions.
Depending on the product, this may take a few minutes in a dry frying pan, oven or toaster.
The goal is to make the bread flexible and warm, not brittle.
If the pita is heated too long, it can dry out and tear when opened.
Allow the bread to cool just enough to handle safely.
Cut each pita approximately halfway across and gently open the pocket.
If the bread does not separate easily, use a small knife carefully rather than forcing it apart.
Step 5: Fill and serve
Divide the chickpea and cucumber mixture into four equal portions.
Spread approximately one-quarter of the yogurt sauce inside each pita pocket.
Add one portion of filling.
Finish with any remaining sauce, distributing it evenly.
Serve immediately.
For a neater pocket, avoid packing all the filling into the bottom. Distribute it along the interior so the bread supports the vegetables.
If your pita breads are unusually small, serve some filling alongside instead of forcing everything inside.
Approximate nutrition per serving
The estimate below uses the complete recipe divided into four equal servings.
| Nutrient | Approximate amount |
|---|---|
| Energy | 390 kcal |
| Protein | 17 g |
| Fat | 9 g |
| Carbohydrates | 60 g |
| Fiber | 12 g |
These are rounded estimates, not laboratory-tested values.
The exact figures depend heavily on the pita bread and chickpea brand. Greek-style yogurts also vary in protein and fat content.
The estimated energy should be interpreted independently from the rounded macronutrient values because nutrition databases and labels can use different conventions for fiber and carbohydrate energy.
For precise tracking, calculate the recipe using the nutrition labels of the ingredients you actually purchase.
Ingredient reference data can be checked through USDA FoodData Central.
Where the calories come from
The largest energy contributions usually come from the chickpeas and pita bread.
Olive oil and yogurt contribute smaller amounts, while cucumber, tomatoes, herbs and lemon juice add comparatively little energy.
A practical breakdown for this particular recipe is:
| Component | Approximate energy for entire recipe |
|---|---|
| Chickpeas, 480 g drained | 650 kcal |
| Whole-wheat pita, 260 g | 700 kcal |
| Yogurt, 160 g | 120 kcal |
| Olive oil, 10 g | 90 kcal |
| Vegetables, lemon, herbs and seasonings | 100 kcal |
| Total | 1,660 kcal |
This illustrative breakdown gives approximately 415 kcal per serving.
The difference from the headline estimate of approximately 390 kcal reflects variation in the chickpea, pita and yogurt reference values. For actual tracking, use one consistent set of product labels rather than combining the two estimates.
How to keep the pita from getting soggy
Moisture management matters more than adding extra ingredients.
Three parts of the recipe can release water: the cucumber, the tomatoes and the yogurt sauce.
Drain the chickpeas thoroughly so their packing liquid does not enter the filling.
Remove excess cucumber moisture before mixing.
Use a thick yogurt rather than a thin drinking-style yogurt.
Finally, assemble the pita shortly before eating.
If you are packing lunch for later, keep the bread separate from the filling and sauce until mealtime.
This also helps preserve the texture of the vegetables.
Can you make the filling ahead?
Yes.
You can prepare the chickpea mixture and yogurt dressing in advance.
For the best texture, keep the chopped cucumber separate until shortly before serving, particularly if you plan to store the filling overnight.
Store the chickpea mixture and dressing in clean, covered containers in the refrigerator.
A practical approach is to prepare the components the evening before and assemble the pita the next day.
For cooked or prepared leftovers, follow safe refrigeration practices and avoid leaving perishable ingredients at room temperature for extended periods.
As a conservative meal-prep target, use the prepared components within three to four days when continuously refrigerated at 4°C or below, while following any shorter limits indicated on product packaging.
Food-storage reference: FoodSafety.gov cold food storage charts.
Packing pita pockets for work or school
For a packed lunch, use three separate components:
- Pita bread wrapped or stored in a clean container.
- Chickpea and vegetable filling in a leak-resistant container.
- Yogurt dressing in a small sealed container.
Keep the perishable components chilled during transport.
Assemble the pita when you are ready to eat.
This takes only a minute or two and prevents the bread from absorbing moisture during the morning.
If refrigeration is not available, use an insulated lunch bag with suitable cold packs and follow food-safety guidance for perishable foods.
How to make the recipe vegan
The chickpea and vegetable filling is already plant-based.
To make the complete recipe vegan, replace the dairy yogurt with an unsweetened plant-based yogurt suitable for savory sauces.
Choose a thick product, ideally one without added sugar.
Plant-based yogurts vary substantially in protein content.
Soy-based options may provide more protein than some coconut-based products, but check the label.
The calorie and protein estimates for the original recipe will no longer apply exactly.
Also check that the pita bread contains no dairy, egg or other animal-derived ingredients.
How to make the recipe gluten-free
Traditional wheat pita contains gluten.
For a gluten-free version, use a suitable certified gluten-free pocket bread or serve the chickpea mixture in a gluten-free wrap.
Check the labels of the yogurt and any packaged seasonings if you need strict gluten avoidance.
Gluten-free breads vary in weight and nutritional composition, so recalculate the recipe if you are tracking calories or macronutrients.
Do not assume that a gluten-free pita has the same energy value as the whole-wheat bread used here.
Increasing the protein
There are several ways to raise the protein content without changing the character of the recipe.
One option is to use a higher-protein strained yogurt for the dressing.
Another is to add a small amount of crumbled feta, provided dairy is suitable for your diet.
You can also serve the pita alongside a protein-containing side dish.
If you add feta or other ingredients, remember that they change the total energy, fat and sodium content.
Simply adding more chickpeas also increases protein, but it increases calories and carbohydrates at the same time.
For reliable meal planning, calculate the final recipe rather than assuming that every protein addition has a negligible energy cost.
Making a lighter version
If you prefer a lower-energy version, start by reviewing the bread size and the added oil.
A smaller pita can reduce the total energy, although it may hold less filling.
You can also omit the 10 g olive oil and use additional lemon juice or a small quantity of water to season the chickpeas.
This removes approximately 90 kcal from the complete recipe, or about 23 kcal per serving.
The result will taste slightly less rich.
Avoid removing so much dressing that the filling becomes dry and difficult to eat.
A satisfying portion that fits your needs is more useful than making the lowest-calorie version possible.
Variations that work
Mediterranean-style filling
Add finely chopped fresh mint and a little extra parsley.
A small quantity of feta can provide a salty finish.
Spicy chickpea pita
Add chili flakes, smoked paprika or a little hot sauce to the chickpeas.
Keep the yogurt dressing mild for contrast.
Extra-crunchy version
Add finely chopped radish or a small amount of shredded lettuce.
Dry the vegetables well before assembling.
Tahini-lemon dressing
Replace the yogurt sauce with a dressing made from tahini, lemon juice and water.
This creates a richer sesame flavor and makes the sauce dairy-free if no other animal-derived ingredients are used.
Tahini is energy-dense, so calculate the dressing separately rather than assuming it has the same calories as the yogurt version.
What to serve alongside
These pita pockets can work as a complete light meal, depending on portion size and individual needs.
If you want a larger meal, add a side of roasted vegetables, vegetable soup or fruit.
For a meal with more protein, choose a side that contributes meaningful protein rather than simply adding more bread.
If you are serving several people, you can put the components on the table and let everyone assemble their own pita.
This is especially useful when different people prefer different amounts of onion, sauce or seasoning.
Common preparation problems
The bread tears. It may be too dry, too cold or not designed to form a pocket. Warm it gently and open it carefully.
The filling falls out. Mash a small portion of the chickpeas and chop the vegetables more finely.
The pita becomes wet. Drain the chickpeas and vegetables better, thicken the dressing and assemble closer to serving.
The flavor is bland. Check the lemon juice, salt, herbs and cumin. Chickpeas often need sufficient seasoning.
The sauce tastes too sharp. Add a little more yogurt rather than trying to correct it with sugar.
These adjustments preserve the basic recipe without requiring a long ingredient list.
Scaling the recipe
The ingredient quantities can be scaled directly.
For two servings, use half of every ingredient.
For eight servings, double the quantities.
However, bread size and actual drained chickpea weights can vary between products.
If your cans provide 230 g drained chickpeas each rather than 240 g, two cans supply 460 g.
That small difference is acceptable for cooking, but use the actual amount for precise nutrition calculations.
When preparing larger batches, keep the dressing separate and combine the vegetables only when needed.
A practical lunch worth repeating
Chickpea and cucumber pita pockets work because they combine a substantial legume filling with fresh vegetables, a flavorful sauce and bread that makes the meal easy to carry.
The most important techniques are simple: drain the ingredients, lightly mash some chickpeas, keep the dressing thick and assemble the pita shortly before eating.
With those details handled, the recipe is quick enough for an ordinary weekday and flexible enough for different preferences.