
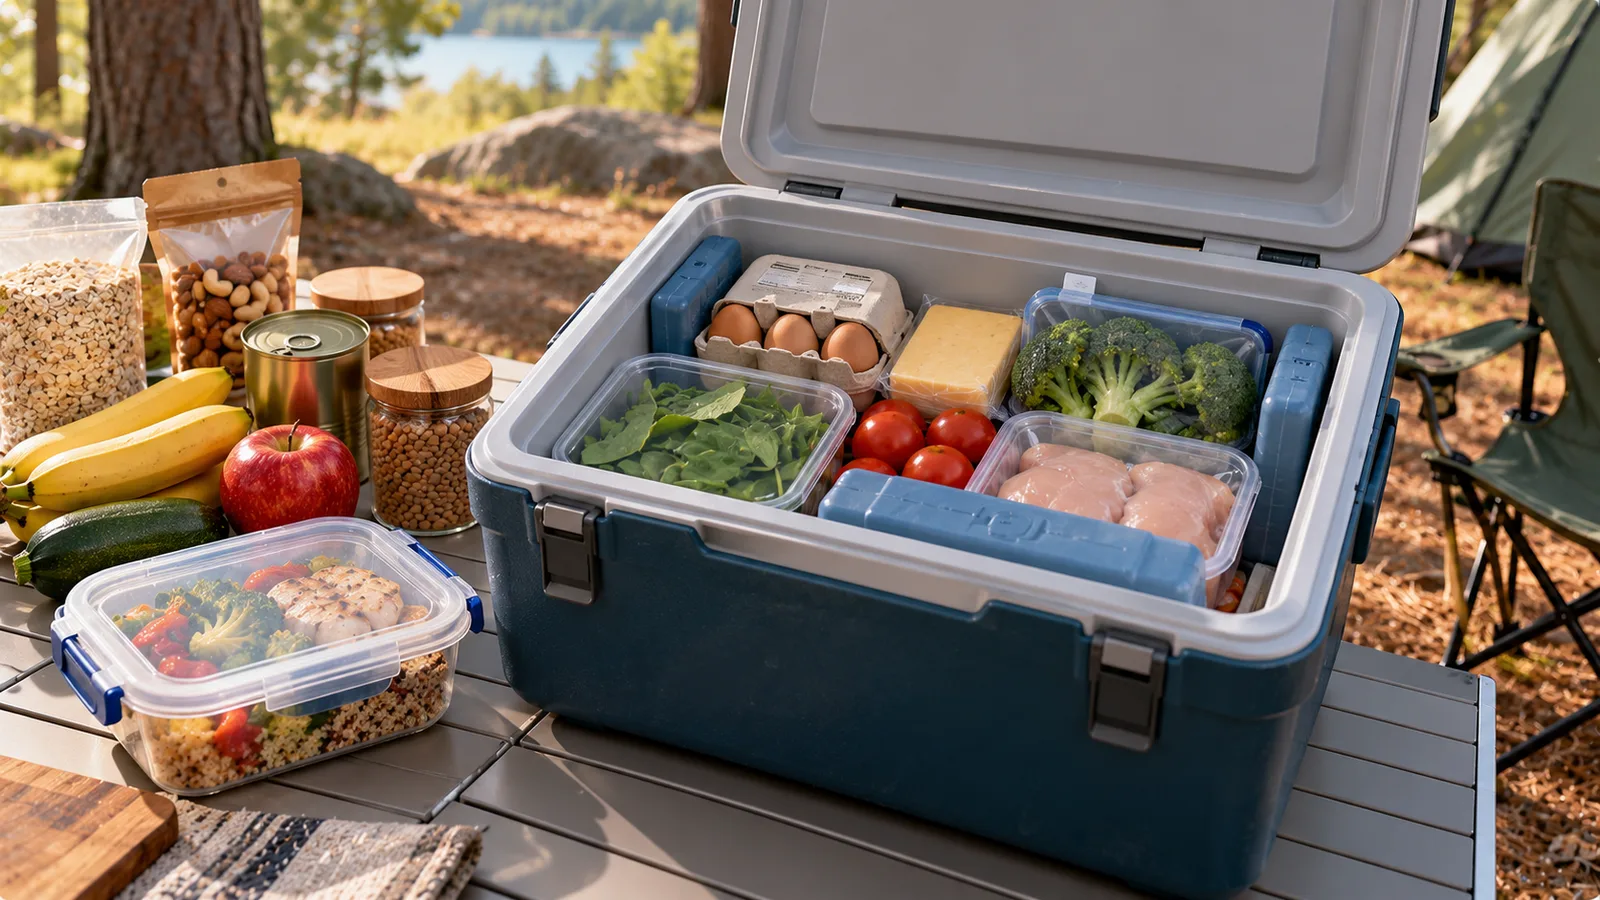
Meal planning for a camping trip is different from planning meals at home. Refrigerator space becomes cooler space, cooking equipment is limited, ice gradually melts, and ingredients need to survive transportation as well as several days outdoors.
A useful camping meal plan therefore starts with the cooler rather than with a long list of recipes.
The goal is to reserve chilled space for foods that genuinely need it, use shelf-stable ingredients wherever practical, and arrange meals so the most perishable foods are eaten first.
This example builds a practical three-day plan for two adults with one medium-sized cooler and basic camp cooking equipment.
The basic strategy
Before choosing individual meals, divide food into two groups.
Cooler foods:
- raw meat or fish;
- eggs when refrigeration is required for the product you buy;
- dairy products;
- opened sauces;
- prepared foods that require refrigeration;
- cut fruit and vegetables when appropriate.
Shelf-stable foods:
- oats;
- rice;
- pasta;
- tortillas;
- canned beans;
- canned tuna;
- unopened shelf-stable sauces;
- nuts and seeds;
- whole fruit;
- bread;
- coffee and tea.
Every shelf-stable ingredient you use leaves more cooler capacity for foods that actually need cold storage.
A 3-day camping meal plan for two adults
| Day | Breakfast | Lunch | Dinner |
|---|---|---|---|
| Day 1 | Yogurt, oats, banana and nuts | Tortilla wraps with chicken and vegetables | Chicken, potatoes and peppers |
| Day 2 | Eggs, bread and tomatoes | Tuna and bean wraps | Bean and tomato pasta |
| Day 3 | Oatmeal with banana and nuts | Chickpea wraps | Rice with beans and vegetables |
The order is intentional.
Fresh chicken and chilled yogurt are used early. Later meals depend increasingly on canned and dry ingredients, reducing the consequences if ice becomes less reliable near the end of the trip.
Day 1 breakfast: yogurt, oats, banana and nuts
For two people:
- 400 g plain yogurt;
- 100 g rolled oats;
- 2 bananas;
- 40 g nuts.
This breakfast uses a refrigerated ingredient immediately, which helps free cooler space.
Divide the yogurt between two bowls and add oats, sliced banana and nuts.
If cooler capacity is especially limited, replace the yogurt with shelf-stable milk or another suitable shelf-stable breakfast.
Day 1 lunch: chicken wraps
For two people:
- about 250 g cooked chicken;
- 4 medium tortillas;
- 1 bell pepper;
- 1 tomato;
- about 60 g hard cheese, optional;
- sauce or mustard as desired.
One efficient option is to cook the chicken at home, chill it thoroughly and transport it cold.
Keep prepared chicken refrigerated until it is time to eat.
Do not leave cooked chicken sitting around camp for hours before lunch.
Day 1 dinner: chicken, potatoes and peppers
For two people:
- 300–350 g raw chicken;
- 500 g potatoes;
- 2 bell peppers;
- 1 onion;
- 15 g cooking oil;
- salt and seasonings.
Cut the potatoes into relatively small pieces so they cook faster and require less fuel.
Cook the chicken thoroughly. If using a thermometer, follow the safe minimum internal-temperature guidance applicable where you live.
Avoid partially cooking poultry at home with the intention of finishing it much later at camp.
Day 2 breakfast: eggs, bread and tomatoes
For two people:
- 4 eggs;
- 4 slices of bread;
- 2 tomatoes;
- approximately 10 g oil or butter for cooking.
Egg storage requirements vary between countries because commercial handling practices differ.
Follow the storage instructions for the eggs you purchased. If they are sold refrigerated and labeled to remain refrigerated, keep them properly chilled in the cooler.
Day 2 lunch: tuna and bean wraps
For two people:
- 1 can tuna, approximately 140–160 g drained;
- 1 can beans, approximately 220–250 g drained;
- 4 tortillas;
- 1 tomato;
- 1 small onion;
- mustard or another suitable sauce.
Drain the tuna and beans immediately before preparing the wraps.
Because unopened cans do not need cooler space, this meal reduces dependence on refrigeration.
Once opened and mixed, however, leftovers should be handled as perishable food.
Day 2 dinner: bean and tomato pasta
For two people:
- 180 g dry pasta;
- 1 can beans, approximately 240 g drained;
- 400 g canned tomatoes;
- 1 small onion;
- 10 g oil;
- dried herbs;
- salt and pepper.
Cook the pasta.
In a second pot, or in the same pot after draining the pasta if equipment is limited, heat the onion, tomatoes, beans and seasonings.
This meal relies almost entirely on shelf-stable ingredients.
Day 3 breakfast: oatmeal
For two people:
- 120 g oats;
- 500 ml shelf-stable milk or water;
- 2 bananas;
- 40 g nuts.
Oatmeal is useful late in a camping trip because none of the basic ingredients need to occupy cooler space before opening.
If using shelf-stable milk, choose package sizes that can be finished soon after opening when refrigeration is limited.
Day 3 lunch: chickpea wraps
For two people:
- 1 can chickpeas, approximately 240 g drained;
- 4 tortillas;
- 1 tomato or another remaining vegetable;
- mustard, hot sauce or another shelf-stable condiment;
- seasonings.
Mash some of the chickpeas with the condiment and leave the rest whole for texture.
This creates a filling lunch without depending on meat or dairy.
Day 3 dinner: rice, beans and vegetables
For two people:
- 160 g dry rice;
- 1 can beans, approximately 240 g drained;
- 1 bell pepper;
- 1 onion;
- 400 g canned tomatoes;
- 10 g oil;
- spices.
Cook the rice according to the package directions.
Cook the vegetables, beans and tomatoes separately or combine them once the rice is nearly ready.
This is deliberately one of the least refrigeration-dependent meals of the trip.
Grocery list for the full three days
For two adults, the plan requires approximately:
Chilled or perishable foods
- 400 g plain yogurt;
- 250 g cooked chicken;
- 300–350 g raw chicken;
- 4 eggs;
- approximately 60 g hard cheese if using;
- any sauces that require refrigeration after opening.
Produce
- 4 bananas;
- 4–5 tomatoes;
- 4 bell peppers;
- 3 onions;
- 500 g potatoes.
Shelf-stable foods
- about 220 g oats;
- 8 slices or roughly one small loaf of bread;
- 12 tortillas;
- 180 g dry pasta;
- 160 g dry rice;
- 1 can tuna;
- 3 cans beans;
- 1 can chickpeas;
- 800 g canned tomatoes;
- 80 g nuts;
- approximately 45 g cooking oil;
- shelf-stable milk if using;
- mustard or other suitable condiments;
- salt, pepper and spices.
Adjust quantities for appetite, activity level and the actual package sizes available.
Cooler space should be treated as a limited resource
A common planning mistake is choosing every meal first and only afterward trying to fit the ingredients into the cooler.
Reverse the process.
Estimate how much space is available after adding enough ice or frozen cold packs.
Then prioritize that remaining space.
High-priority cooler items might include:
- raw chicken;
- cooked chicken;
- yogurt;
- eggs if they require refrigeration;
- cheese and refrigerated condiments.
Dry pasta, canned beans and whole onions should not occupy valuable cooler space.
Pack the cooler by meal order
The foods needed last should generally be harder to reach.
The foods needed first should be accessible without completely unpacking the cooler.
For example:
Bottom / coldest protected area
- securely packaged raw meat;
- frozen cold packs.
Middle
- yogurt;
- eggs;
- cheese;
- other chilled foods.
Top or easy-access area
- Day 1 lunch ingredients;
- drinks that must be chilled.
Raw meat should be packaged so leaking juices cannot contaminate ready-to-eat foods.
A sealed container or leak-resistant bag adds useful protection.
Consider a separate drinks cooler
If you have enough equipment, keeping drinks separate can improve food temperature control.
A drinks cooler is often opened repeatedly throughout the day.
Every opening introduces warm air and accelerates warming.
A food cooler that stays closed for longer periods can maintain a safer temperature more effectively.
Keep perishable food cold
For foods that require refrigeration, a practical food-safety target is to keep them at about 4°C / 40°F or below, following local food-safety guidance.
A small refrigerator or cooler thermometer is useful because the outside temperature of the cooler does not tell you the actual food temperature inside.
Add enough ice, frozen gel packs or another suitable cold source to maintain refrigeration temperatures.
The danger of guessing by touch
Food can feel cool without actually being cold enough for safe storage.
Do not rely only on:
- touching the package;
- checking whether some ice remains;
- judging the temperature of the air inside the cooler.
A thermometer provides much more useful information.
Use raw meat early
Raw meat is one of the foods most dependent on reliable cold storage.
For a short trip, planning meat-heavy meals for the first day can simplify later food management.
The sample plan therefore uses chicken on Day 1 and shifts toward canned legumes, tuna and dry foods afterward.
This reduces the amount of highly perishable food remaining as the trip progresses.
Frozen food can act as part of the cooling system
Some foods can be frozen before departure when appropriate.
For example, a thoroughly chilled or frozen prepared item may help keep neighboring foods cold as it gradually thaws.
However, freezing food does not replace good cooler management.
You still need sufficient ice or cold packs and safe temperatures.
Do not fill the cooler with unnecessary packaging
Large retail packages consume space.
Before the trip, you can portion suitable foods into clean, food-safe, leak-resistant containers.
For example:
- measure the amount of cheese needed;
- portion meat by meal;
- transfer small amounts of condiments when this can be done safely;
- remove unnecessary cardboard packaging.
Do not remove labels or instructions you may need for food safety or allergen information.
Prepare ingredients at home when useful
Camp cooking becomes easier if some work is completed before departure.
Possible preparation includes:
- washing vegetables;
- measuring dry ingredients;
- mixing dry seasonings;
- cooking chicken for the first lunch;
- dividing oats into portions.
Pre-cut produce may require refrigeration, while whole produce can sometimes be more robust.
Do not create extra refrigeration requirements merely to save a few minutes of chopping.
Shelf-stable backups matter
Even a well-planned cooler can fail.
Ice may melt faster than expected, the weather may be hotter than forecast, or the trip may last longer.
Carry at least one meal that does not depend on the cooler.
A simple emergency meal for two might be:
- 1 can beans;
- 1 can tuna or chickpeas;
- tortillas or crackers;
- whole fruit;
- nuts.
This is also useful if cooking equipment fails.
Plan water separately
Food planning and drinking-water planning should be treated as separate calculations.
You may need water for:
- drinking;
- coffee and tea;
- oatmeal;
- rice or pasta;
- washing hands;
- cleaning cookware.
Do not assume that water intended for drinking can also cover every cooking and cleaning need without calculating the total.
When relying on local water sources, follow appropriate guidance for treatment and safety.
Reduce dishwashing requirements
Water and fuel can be limited, so choose meals that use relatively little cookware.
The plan deliberately includes:
- wraps;
- one-pot pasta;
- oatmeal;
- rice and beans.
You can also prepare meals in an order that reduces unnecessary washing.
However, utensils and surfaces that contact raw poultry or meat need proper cleaning before they are used for ready-to-eat foods.
What to eat first if the cooler warms up
If temperature control becomes unreliable, do not simply continue following the original menu.
The most perishable foods require the most caution.
Use objective temperature information and recognized food-safety guidance to decide whether food remains safe.
When in doubt about food that has spent too long above safe refrigeration temperatures, discarding it is safer than trying to rescue it by cooking.
Cooking does not necessarily reverse every risk created by improper storage.
Avoid planning exact leftovers from perishable meals
At home, leftovers can be refrigerated easily.
At camp, every leftover creates another chilled container that must remain safely cold.
For this reason, it is often useful to cook closer to the amount you expect to eat.
For two adults, for example, 180 g dry pasta may be more practical than cooking an entire 500 g package and trying to refrigerate the remainder.
How to scale the plan for four people
Most ingredient quantities can simply be doubled.
For example:
- 180 g pasta becomes about 360 g;
- 160 g rice becomes about 320 g;
- 4 eggs become 8;
- 4 tortillas become 8 for a meal.
Cooler capacity does not scale as easily.
Four people may require a substantially larger cooler or a second cooler because the amount of chilled food and cold packs both increase.
Camping without reliable ice replacement
If you cannot replenish ice during the trip, shift more aggressively toward shelf-stable meals as the days progress.
A useful pattern is:
Day 1: fresh meat and dairy.
Day 2: eggs, hard cheese and canned foods.
Day 3 onward: canned legumes, dry grains, tortillas, shelf-stable milk, nuts and whole produce.
The exact schedule depends on measured cooler temperatures, not simply the day number.
Hot-weather camping
Higher outdoor temperatures make cold storage more difficult.
Useful practices include:
- keeping the cooler in shade;
- minimizing how often it is opened;
- avoiding leaving it in a hot vehicle;
- using adequate ice or frozen packs;
- monitoring internal temperature.
A meal plan that works in cool spring weather may require more shelf-stable foods during a hot summer trip.
A simpler one-cooler formula
For a short trip, you can build the menu around this pattern:
First third of the trip: most perishable meals.
Middle: moderately perishable foods plus canned ingredients.
Final third: mostly shelf-stable meals.
This creates a natural decline in refrigeration dependence as cooling capacity becomes less predictable.
Final planning checklist
Before leaving, confirm that you have:
- enough cooler capacity after accounting for ice;
- a thermometer for chilled food;
- raw meat packaged separately from ready-to-eat food;
- the most perishable meals scheduled early;
- dry and canned foods for later meals;
- at least one shelf-stable backup meal;
- enough cooking fuel;
- enough safe water;
- a can opener if required;
- food-safe containers or bags;
- a plan for waste and leftovers.
Camping meal planning works best when the menu, cooler and cooking setup are treated as one system.
Instead of trying to reproduce a home kitchen outdoors, use refrigeration only where it provides the most value. Eat highly perishable foods while temperature control is strongest, then transition toward canned and dry ingredients.
That approach reduces cooler crowding, simplifies cooking and makes the final days of the trip much easier to manage safely.